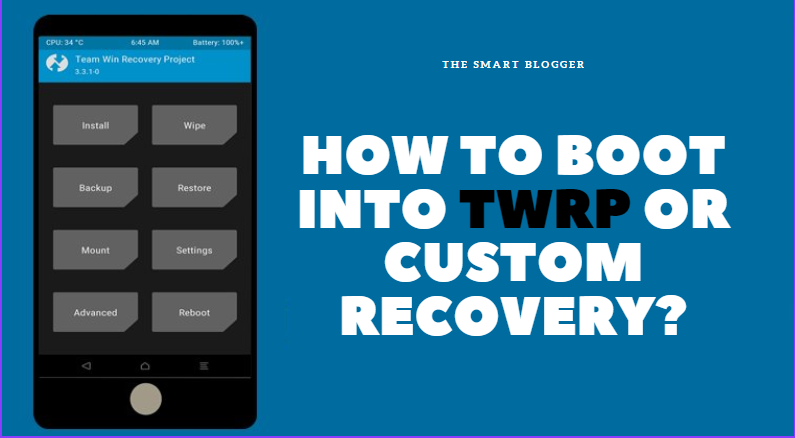
boot into TWRP
A custom recovery solution for Android devices is the TeamWin Recovery Project, also known as TWRP. It is an app that allows you to flash the ROM of a device, wipe it, recover it, or back up it. A custom TWRP recovery must be installed on your device before you can boot into TWRP recovery mode. Using a program like Odin 3, you can download a file and then flash it to your device. To boot into recovery mode, follow the normal procedure. You can root your phone using Magisk, install custom ROMs and kernels, and back up your phone using TWRP.
TWRP features and functions

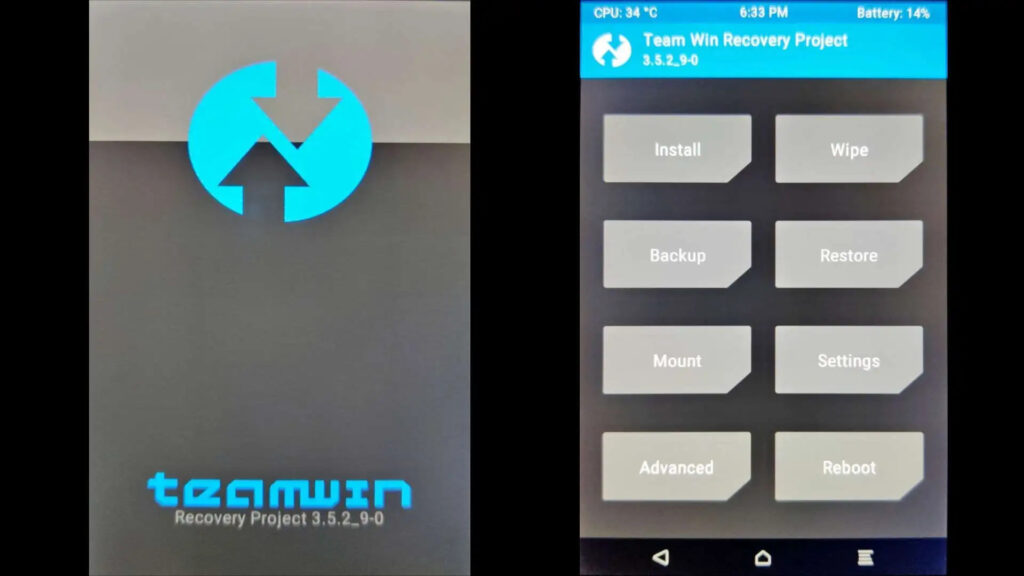
Your Android smartphone has been successfully installed with TWRP. Then what? You might feel intimidated when you boot into TWRP for the first time. There are many options available, so make sure you know what you’re doing. It is not a good idea to wipe your system partition by mistake and become unable to boot into an OS! Below are brief explanations of each TWRP option and when you might need it.
How to install
Once you’re in TWRP, you’ll see this option right away, so it’s probably the primary reason you installed a custom recovery. An image file or ZIP file can be flashed with a custom recovery like TWRP.

The device can be rooted with a Magisk package, a custom ROM, a tweak, or a kernel package. By selecting this option, you can view a list of all the files and folders that are stored on your phone.
Using this page, you can select the zip file that you would like to flash and install it. At the bottom right, you can install an image file such as a kernel or a different recovery. If your file is stored on a USB drive connected via OTG, you can switch between the internal memory on your phone, an external SD card, or even an external SD card.
1. Take a wipe
Essentially, this is a factory reset option with more control. This section allows you to wipe specific portions of your device, such as cache and data. Before installing a custom ROM, you should wipe your device via this option.
2. The backup
It’s a fairly straightforward process. Through the backup option, you can take a backup of your entire smartphone. You can back up everything from your home screen setup to your contacts, messages, apps, and app data using this method. You can use it to clone your phone and create a backup file that you can restore if you brick it.
Taking a full backup of your device via TWRP is always a good idea before making any changes. The EFS partition can even be backed up from here. Using the Select Storage option, you can back up your internal storage, an external SD card, or a USB drive.
3. Restore
You can restore your previous TWRP backup from this section if you have one. A backup can be restored if you run into problems after making a change to your phone.
4. Mount
The data present on every phone is divided into certain partitions. Your operating system is installed on the System partition, your files are stored on the Data partition, and cached data is stored on the Cache partition. This section allows you to mount or unmount partitions inside TWRP. By enabling TWRP, you can access some partitions on your device.
Mounting your data partition, for example, will allow you to view and modify files on your device. Unmounting the data partition will prevent TWRP from accessing your storage. You must first mount the USB-OTG option if you’ve connected an external USB drive via OTG to flash files or make a backup/restore of it. When your phone is connected to a PC using MTP, you can access the internal storage while inside TWRP itself.
5. Settings
On Android, this panel is similar to the Settings menu. Inside TWRP, you can adjust the screen brightness, vibration intensity, navbar orientation, language, and time zone.
It is also possible to change themes inside the Settings tab of some unofficial versions of TWRP, such as Orange Fox Recovery.
6. Advanced
There is an option to copy logs in the advanced section of the TWRP menu if you would like to share certain error codes.
ADB is also available here. Add apps and files via ADB, and use a file manager if you want to make some changes to files. The SD card can also be partitioned here.
7. Reboot
You can reboot the system from here or power off your device once you have flashed a file or completed your work in TWRP.
You can also choose between two other options. Rebooting into recovery is one option, and rebooting into the bootloader to put your phone in fast boot mode is another. Using Fastboot on your PC is useful when flashing something.
What is the purpose of TWRP recovery?
A custom recovery image for Android-based devices, the Team Win Recovery Project (TWRP), is an open-source software project. With its touchscreen interface, users can install third-party firmware and back up their current system with features not supported by stock recovery images.

A step-by-step guide to booting into TWRP recovery mode
TWRP recovery is beneficial for many reasons. Your knowledge of TWRP recovery may be limited to rooting Android devices. It also has a number of other benefits.
The three things you can do with TWRP Recovery are as follows:
1. The System Update feature is available.
2. Android phones should be factory reset.
3. It is possible to clear the cache on your phone.
Booting into recovery using Android Debug Bridge (ADB)
It is a good idea to use ADB if the physical buttons on your smartphone are not working anymore for whatever reason. The fastest way to do this is to download MINIMAL ADB and Fastboot for your PC or Mac. For those who don’t have it already, follow these instructions for installing ADB on their computer.
- If you haven’t already done so, connect your phone to your computer with a USB cable once ADB has been installed. In Developer Settings, USB Debugging needs to be enabled.
- You can find ADB in the folder where you installed it. You can open a Command window or a PowerShell window when you right-click on the ADB folder while holding down the ‘control’ key. The ADB directory can also be accessed by launching a command prompt window and entering ‘cd’.
- You can now confirm your smartphone is properly connected by typing ADB devices and hitting enters. You’ll see a string of numbers if it’s true in the command window.
- The phone will reboot to recovery once you type in ADB reboot recovery.
On a rooted device, how to boot into recovery using an app
Recovery Reboot and Quick Reboot are apps that help you boot into recovery if you have a rooted Android device. To boot into recovery, you simply need to open the app and grant root access. The power menu also provides options for directly booting into recovery mode on many custom ROMs.
In addition to booting into stock recovery, these methods allow you to boot into custom recovery as well. When accessing your smartphone’s recovery, make sure you know what you’re doing. This can result in wiped internal storage if you reset it by mistake, or possibly, a bricked device if you flash the wrong zip file. Making a backup is always a good idea before modifying your device — especially when flashing a ROM at 4% battery life.
What makes TWRP the preferred custom recovery choice for modders
TWRP is a favorite among Android modders for its active development and support for a wide variety of devices. New devices are added regularly to the official build roster.

Thanks to the open-source nature of the project, aftermarket developers can also port TWRP unofficially to many other devices. There are a number of forks and further functionality enhancements like dual boot mods based on TWRP because the internal structure of the recovery is quite modular.
Installing TWRP recovery on Android devices
You can begin customizing your Android device by installing TWRP.
The following guide should guide you through the process of installing TWRP on your device.
TWRP for Android: How to install it
Make sure the following are in place before starting with TWRP:
1. ADB and Fastboot are installed on a PC, Mac, or Chromebook.
The Build Number can be found by going to Settings -> about device on the device. It needs to be tapped seven times to be enabled as a developer. If you’re on an older version of Android, go to Settings and select Developer options (or go to System -> Advanced and select Developer options). Finally enable USB debugging.
2. The target Android device has an unlocked bootloader.
When unlocking the boot loader of a Samsung device, KNOX will trip.
Step 1: The first step is to download TWRP for your device
To begin, download the appropriate TWRP image for your device.
Download TWRP
If you have the right device, you can also get unofficial TWRP builds.
Step 2: The second step is to flash TWRP
The installation process depends on the partition scheme of the target device since TWRP replaces the stock recovery image. It can be easily checked by running getpro.build.ab_update in an ADB shell or Terminal Emulator
If the device supports A/B partitions, it will return “true”. The output should be blank on legacy A-only devices.
Case 1: The A-only partition scheme on devices
Fastboot should allow you to replace the stock recovery image with TWRP directly if your device uses the A-only partition scheme.
1. On your PC, copy the TWRP image to the appropriate location. It can even be placed in the same folder as the Fastboot binary.
2. Use the command prompt or terminal on your PC to type:
adb reboot bootloader
3. Rename the TWRP image to twrp.img and type the following:
fastboot flash recovery twrp.img
fastboot reboot
· Many devices will automatically replace a custom recovery during the first boot. You can prevent this by finding the right key combination for your device to enter recovery. TWRP can be booted by holding the key combo after typing fastboot reboot.
· The following command can also be used to temporarily boot the downloaded image:
fastboot boot twrp.img
· As soon as TWRP is booted, it will patch the stock ROM in order to prevent it from replacing TWRP. The installation will have to be repeated if you don’t follow this step.
4. Congrats! Now that TWRP has been installed on your device, it is ready to use.
A custom recovery can be flashed by power users without using a PC, but root access is required. Install TWRP on your phone by downloading the appropriate image, renaming it to twrp.img, and placing it in the internal storage, /sdcard. Using an ADB shell or a terminal emulator, run the following commands:
su
dd if=/sdcard/twrp.img of=/dev/block/bootdevice/by-name/recovery
It is possible that your device does not have a standalone recovery partition in some rare cases. Boot images include recovery as part of the boot process. Such devices may be repurposed by TWRP maintainers into a recovery environment using a different partition. Due to this, those devices may require some tweaking during the flashing process.
Case II: A/B partitioned devices
The Recovery environment and boot image are fused together on a device with an A/B partition scheme. TWRP is initially installed in this custom recovery environment and then permanently within the TWRP recovery environment.
1. Make sure the TWRP image is copied to a suitable location on your PC. The Fastboot binary can even be placed in the same folder.
2. Use the command prompt or terminal on your PC to type:
adb reboot bootloader
3. To boot the TWRP image temporarily, rename it to twrp.img and type the following:
fastboot boot twrp.img
4. The twrp.img file should be copied to the device as follows:
adb push twrp.img /sdcard
5. In TWRP’s advanced menu, select “Install Recovery Ramdisk”.
6. Go to the internal storage of the device and select twrp.img.
7. Install and reboot after swiping.
8. Congrats! The device has now been successfully installed with TWRP.
In the case of Samsung
Unlike traditional Fastboot devices, Samsung Galaxy devices are not compatible with TWRP, so the installation process is different.
1. You can download Odin (Samsung’s Flash Tool) and extract it.
2. Download the TWRP *.tar file for your target device on your PC.
3. The computer should be rebooted into download mode. You will need to open Odin on your PC and upload that tar file to the [AP] slot.
4. When Odin flashes your device, hold down the recovery mode key-combo (usually volume up and power) until the TWRP recovery environment appears.
5. The Multidisabler must be flashed once installed if you wish to disable certain device protection features.
6. Congrats! Your device has now been successfully installed with TWRP.
Step 3: verification.
The final step is to verify that the custom recovery is working properly. An already running device can be booted into recovery mode by using the device-specific key-combo or the ADB reboot recovery command. A menu such as the one below means that TWRP has been successfully installed.
Last but not least, be sure to download the official recovery app from Google Play. Whenever there is an updated version of the custom recovery, the app will alert you. The latest version can also be downloaded directly from your device if you have root access.
Boot into TWRP (Custom Recovery)
To boot into Custom Recovery, you can use three different methods. Each method will be discussed in detail step by step.
Method 1: How to boot into TWRP or CWM
Android phones do not need to be rooted to use this method. AH! Definitely, it is a good point. You don’t need to ROOT your phone to use this method.
You will need to follow these steps carefully.
1. The first step is to enable USB debugging on your Android device
2. Your phone’s data cable should be used to connect to a laptop or computer. Your Android phone must be enabled to accept USB debugging now. Do you have no idea how to do this? There are a few points you need to keep in mind.
· Open your phone’s settings.
· A tab appears on the Developer Options page.
· Tick USB Debugging in the developer options.
You may not be able to see the developer options on some phones. The following method will show you these developer options:
· Select About Device from the Settings menu
· The Build Number can be found under About Device
· Make sure you tap on the Build Number option several times.
· You will see that the developer options have been enabled.
· You can access developer options by going back to Settings.
· To enable USB debugging, go to Developer options.
After enabling USB Debugging on your Windows computer, install ADB and Fastboot.
Method 2: Use Quick Boot to boot into Custom Recovery
Quick Boot allows you to boot into TWRP Recovery or custom recovery on Android devices. You must root your phone for this to work. This method cannot be used if your phone is not rooted.
Here’s how you can root your phone in just a few clicks:
A step-by-step guide to rooting Android phones in a single click
· As soon as you have rooted your Android phone, you can install the Quick Boot app.
· Get Quick Boot from the Play Store or install this app on your phone.
Method 3: Boot into TWRP using the power button
1. Your Android phone must be turned off before it can be used.
2. To do this, you simply need to keep pressing the “Power Button + Volume Down”. Some phones require you to keep pressing the “Power Button + Volume Up”.
3. Congrats! Congratulations! You’ve done it!
Are you still having trouble booting into Custom Recovery? To boot your phone, choose your model and use these keys.
Press the Power button, Volume Up, and Home button at the same time. Before pressing these buttons, make sure your phone has been turned off.
The LG logo will appear after you hold down the “Power Button + Volume Down”. Before pressing these buttons, power off your phone. It’s a little different for HTC. That’s great if the above method works on your phone! Otherwise, follow these steps:
1.1 Select Settings on your HTC phone.
1.2 Click on the Battery option.
1.3 Fast boot should be unchecked.
1.4 Turn off your HTC phone now.
1.5 For a few seconds, press the “Power Button + Volume Down”.
1.6 Press the Volume Down button and then release the Power button
1.7 The boot loader is now open. Go up and down with the volume button.
1.8 TWRP Recovery or Custom Recovery can be accessed by pressing the Power Button.
1.9 It’s done!
By consistently pressing “Volume Up + Volume Down + Home Button”, the best results can be achieved. You will now be in the Boot loader.
To access the custom recovery option, use the volume up and volume down buttons. Use the power button to select Custom recovery.


